X
X
X
X

Knowledge Base

HomepageKnowledge BaseweMailingHow to Use weMailling? Installation...

How to Use weMailling? Installation and User Guide


  • How to Install weMailing?

After purchasing weMailing, you need to go to your customer panel and download weMailing to your device. After downloading the file, you should go to the 'Downloads' folder, right click on the weMailing rar file and click on the 'Extract Files..' button. Finally, You can install the program in any location.


  • How to Login?

After completing the installation, double-click the weMailing.exe' file. Then select the Language and click the ok button.
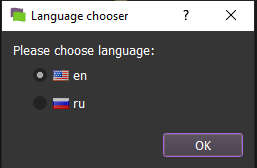
Enter your license information sent to you in the relevant section.

Your installation process is complete.


  • General Settings

  1. Max Run : Number of browsers to be opened in total
  2. Threads : Number of browsers to open at the same time

  • Enter 1 mail address and how many mails you want to send. (You can send more than one mail with 1 mail address.)

  • 1 Enter how many seconds you want the mail to wait after sending.

  • Select Folder of messages to send:

You must select the folder where the contents (messages) of the mails to be sent are located.

You should add .txt files inside the file.

  1. The name of the txt file : "Mail Subject Header"
  2. Txt content : Mail to send


  • Sender Settings

  1. Select Mail List for Sending : You must select the .txt file containing your mail addresses. Each line must have one mail address. (Mail format should be ("mailaddress:password").
  2. Server Address : Here you must enter your "SMTP" address.
  3. Port Number : Here you must enter your "SMTP" Port.
  4. Save Sender Log Folder : Create a new folder and select it. Your logs will be saved in the relevant file in txt.


  • Receiver Settings

  1. Select Mail List for Receiver : You must select the txt file containing the mail addresses to send mail to. Each line should contain one mail address. Mail sent addresses will be deleted from the relevant txt.
  2. Should the e-mail addresses sent be saved : Check "Yes" if you want to save the e-mail addresses to be sent in a file.
  3. Select TXT for Save : Select the empty txt file where the mail addresses to be registered will be stored.


  • Proxy Settings

Check "Yes" if you want to use a proxy.

Select Proxy Type : Select the proxy type you will use here.

For Mobile Proxy;

Mobile Proxy Informations : You must enter your mobile proxy information here.

Mobile Proxy Reset Link : Enter your mobile proxy reset link here. If your mobile proxy automatically "rotates", you do not need to enter it.

For Proxy List;

Proxy List : Here you must select the txt file containing your proxy list (1 proxy per line).


Can't find the information you are looking for?

Create a Support Ticket
Did you find it useful?
(107 times viewed / 0 people found it helpful)

To get more detailed information about our products and services, you can easily contact us via telegram, skype, whatsapp, e-mail, or our contact form.

08503072791

Subscribe

Sign up to be notified of our campaigns and announcements.

0